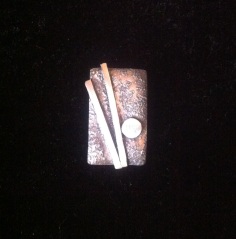
While I was bored out of my skull in History, having the afternoons back in the studio for Surface Dec was a blessing. At the beginning of the week we were given a little pouch with several pieces of 5mm square (or almost-square) brass and copper sheets and 2 sheets of sterling silver. Over the next two weeks we were to compile a library of surface decoration techniques that could be used on Jewellery pieces. Each day we would be shown one or two of the techniques and then we would be left to reproduce them – or not: some people melted them. By the end of the two weeks, we would also have to have made a jewellery piece that used a combination of any three of the surface decoration techniques that we were taught. Plus we had to hand in an experiment.
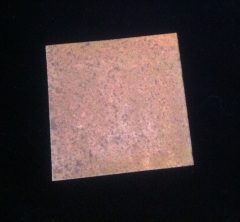
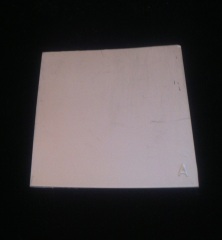
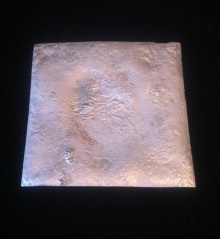
The experiment was fun. I’m a big fan of doing stuff just to see what happens, so this was right up my alley. It was a patination experiment. A patination, or patina, is something that is applied to the surface of a metal that changes its appearance. So after annealing, pickling and thoroughly scrubbing one of our metal pieces down with comet, we were to immerse it into “stuff of our choice” to see how it affected the metal. I chose to do what my teacher dubbed the “potato chip patina” and mixed up 8 spoonfuls of vinegar with 4 spoonfuls of salt into a container of sawdust. I buried my clean piece of copper in the mixture and let it sit for a day. When I came back to check on it the next day, the copper was a bright green, which came off as soon as I ran the copper under water. What was left, was a slight pitting and a brownish discolouration. I dried it off and placed my copper square back into my container, burying it in the sawdust again. I checked it every day for a week at around the same time, documenting the changes I was discovering on the copper before returning it to the container. At the end of the week, I took it out and washed it one last time. It was still turning green every time I took it out of the container, but the green wouldn’t stick around as soon as it got wet. I was disappointed in that, but what was left was a very textured piece that was neat none-the-less. The problem with a surface decoration like this is that over time and with exposure to the air and sunlight, it will continue to change its appearance, so unless I can figure out how to coat it in something (perhaps like a clear varnish) I am not sure how I would implement it successfully in a piece of jewellery.
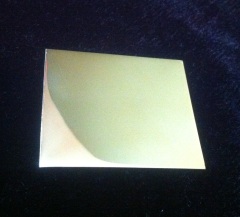
High Polish: Fantastically shiny and gorgeous to look at, but so very easy to ruin or mark once you’re done with it. If someone picks it up, it leaves fingerprints on the surface. It was hours of hand sanding to get this finish before taking it over to the polishing machine (which I am still convinced will eat me when I’m not looking. That machine terrifies me knowing how much damage can be caused if something gets caught in it). I started with 320-grit sandpaper, got out most of the scratches then switched to 400-grit and sanded in a perpendicular direction to the 320. This was important so that I could see when I had sanded out the marks from the previous grit. If I had sanded in the same direction, I would only be making the marks that I was trying to get out deeper, rather than eliminating them. Once I was done with the 400, I moved on to 600-grit and again changed the direction I was sanding. When I was happy with the sanded surface, I used a buff on the polishing machine with some Tripoli buffing compound to get it to the high polish finish. It was a lot of work, and my hands were very stiff and sore when I was done. I kept thinking that there had to be a faster way to do the sanding, like using the foreman rotary tool (or something) but because it was a large flat piece, unless you kept it moving smoothly, you would get sanding marks near the end of the split-mandrel where the sand paper ended. Also you ran the risk of taking off too much metal in one spot when using the machine and then you’d no longer have a flat piece. I’m still convinced there is a way around this; I just haven’t figured it out yet.
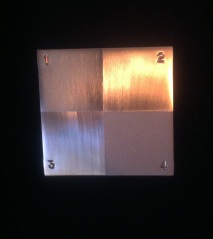
Next were four matte finishes. They were easier than the high polish, but still required I bring them up to a 600-grit sandpaper finish first. I put all four of the finishes on a single metal piece so I could easily see the difference between them without having to line four metal pieces up. I was also putting them in a display binder when I was done, so I wanted to be able to see them without having to flip a page.
1) Plastic wire brush (I should have used an actual wire brush, but the one the school had disappeared and we couldn’t find it. The only difference is an actual wire brush is more pronounced than the plastic one.)
2) “Scrubby Wheel” Brush (I’m sure it has a real name, but no one knew what it was and the teacher couldn’t remember when I asked. It’s an attachment-wheel that goes on the polishing machine.)
3) 600-grit emery paper (Nothing more than just bringing it up to a nice finish with sandpaper.)
4) Sandblasted (My favorite matte finish. The sandblaster we are using at the school is the size of a small room because the glass blowing students use it too. I will have to invest in a table top sized sandblasting machine for my studio because I have endless ideas on how I can use this finish.)
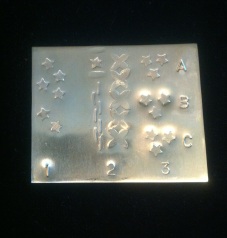
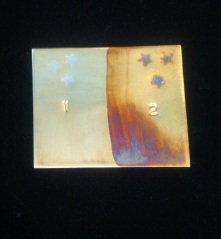
Stamping was fun. We got to make our own stamps for this class using tool-steel and files, so I made a star. The only problem was I didn’t harden my tool correctly when I was done and after about 15 hits I bent the shaft. It’s fixable, but still disappointing. Also, depending on what you have under the metal when you’re stamping, you also get a slightly different effect with the stamp, so when was doing my sample piece, I took the opportunity to stamp on different surfaces so I would have a visual record.
1) Stamping
2) Patterning with stamps
3) A – Stamping on an anvil
3) B – Stamping on wood
3) C – Stamping on Leather
Solder inlay and Liver of Sulphur. We were specifically told in a previous class by a different teacher that solder was never to be used as decoration, and here we were purposely using it as a technique. Everyone in the class got a good laugh out of that. With this sample I did my liver of sulphur on the same piece so you could see the silver solder stand out clearly on the brass. Liver of sulphur smells like rotten eggs. I would much rather use a product called “silver-black” which has a very similar finish but with a tolerable smell. Liver of sulphur also has a different colour on silver than it does on the brass. The brass turned a red-brown whereas when I used the liver of sulphur on some silver later in the week, I got a blue-black finish when I left the silver in for a short amount of time and a dull black finish when I left it in for much longer.
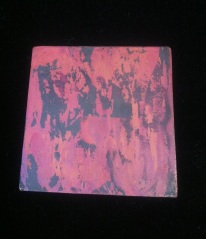
The heat treated copper is one I found fascinating and I hope I will be able to use it at some point in the future. When doing a large piece of heat treated copper, you get inconsistencies and black streaks, but if you are doing a smaller piece, you can get a beautiful and vibrant purple-red. The hardest part about doing heat treated copper, is that if you are making earrings, it is very hard to get both of them the same colour, because your finished product relies entirely on how hot the metal was when it was put into the boiling water and how fast it quenched. It is very hard (although not impossible) to get two pieces that match. You have to coat the heat treated copper in a wax when done or else the copper will continue to change colour over time and with exposure to the elements. I imagine a varnish would work as well, but the teacher uses a wax used on cars in the work that she sells to the public and it lasts just fine.
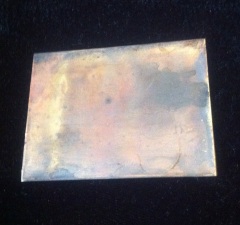
We also had to do a heat treated metal which was nothing more than using a torch to colour a piece of metal. You can get some brilliant colours doing this, but my brass sample was pretty bland. In some light you can see a bit of blue and red, but it doesn’t show up well in the photo.
The next technique was fusing and is another one I would like to use at some point in my own work. Fusing two solid pieces of metal together (See #1) is relatively hard to do evenly and is a bit unpredictable. Mostly you end up melting it into a useless blob that is either un-salvageable or is a lot more work to clean up than if you had just soldered them together. Fusing with metal dust (See #2) is much more predictable and controllable and frankly looks a lot nicer when you are done. I did silver onto copper, but you could also use gold if you had the money or materials.
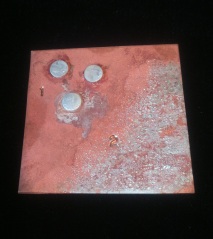
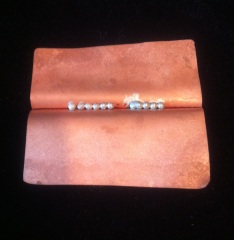
Granulation was a technique that the teacher put togtehr specifically for this class because one of the other techniques that she taught was deemed “no longer safe to be shown in a school environment” (lots of poisonous chemicals involved). Granulation was used in the Etruscan time period and when they did it, they used a concoction of fish scales and other random materials to help stick the balls down. We used much larger granules than the Etruscans did and we didn’t use anything other than the metal fusing technique from the previous sample. This lead to lots of disappointing samples where the granules both didn’t fuse properly and fell off (as some of mine did in the middle) or ended with people melting the granules into the base metal causing them to have to start again. I rolled my copper down to .5mm and creased it so my granules would have a place to rest while I attempted to fuse them down. I can be done on a flat sheet too, but then you would have to be that much more careful with making sure your granules didn’t move when you went to fuse them down. One of the girls in the class used a setting punch on the flat sheet so there was a tiny groove to rest the granules on that was invisible when she was finished. It was quite clever.
Depletion guilding was done on the silver and was pretty straight forward. You heated the sterling silver up, burning out the copper that was in the metal and when you pickled it, any copper that was left was removed leaving a pure silver layer on the surface of the metal. You then repeated the process five or six times to make sure the layer was even. I found the finished layer to scratch easily so I don’t know how viable it is to use on a piece of jewellery or if I just need to do the process more times to make it sturdier. It is something I will have to look into further if I want to use it.
Reticulation was also done on sterling silver and required heating up the silver and letting it air cool several times before heating it up enough to melt metal and push it around the surface with the flame of the torch. The hardest part about reticulation is that it is very easy to melt a hole in the middle of your piece, so it is recommended that if you want to use this technique, you do a large piece of reticulation than cut out a nice section from the finished reticulated piece so you don’t end up with any accidental holes or misshapen jewellery bits. This may be a technique I will use, It will all depend on if I can come up with something that can do it justice.
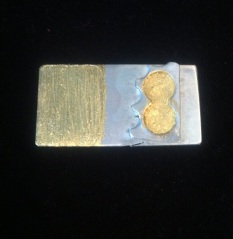
Metal leaf was pretty tame compared to doing the other ones, although no less useful. I did a gold leaf on a left-over piece of silver I had. Metal leaf consists of painting the sizing on the metal and letting it dry for a period of time before pushing the gold leaf onto the glue. The hardest part of metal leaf application is any lines from the paintbrush that are left in the sizing, are clearly seen through the metal leaf (which you can see on the flat portion of my sample). Some of it can be burnished out, some of it will still be visible. Because metal leaf is fragile, it was recommended that it be applied in a recessed area on a jewellery piece so I attempted to apply the sizing and the leaf inside a recessed area. It was a lot harder than I was expecting it to be mostly because the sizing got everywhere. If I were to do this again I would use a much smaller paintbrush.
Having to create a finished piece of jewellery that used three of the surface decoration techniques was interesting. You had to be aware of which techniques would affect the others so when you were assembling the piece, you did everything in the right order. My original piece was going to use fusing, sandblasting and high polish. Unfortunately (or fortunately depending on your outlook) when I was fusing the pieces together I melted them, a lot. This caused me to have to go back and re-think the piece; it was salvageable, but I had to change which techniques I was going to use. After much contemplation, I decided that rather than sandblasting and high polish I would use liver of sulphur and a 600-grit sandpaper matte finish. It’s not a bad piece considering it didn’t turn out how it was supposed to, and if I were to create the piece I had originally designed I would be soldering the shapes on the front, not fusing them. Of course, if I hadn’t done the fusing (and melted the piece) I wouldn’t have had the wonderful texture in the background. So now the question is, could I recreate this mistake and do it again but on purpose? Guess I will have to try it!

